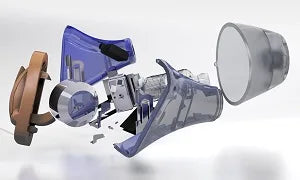
Hearing Aid Maintenance, Repair & Bluetooth Pairing
When it comes to Hearing Aid Maintenance, Repair, and Bluetooth Pairing, getting the right support and service is essential for keeping devices in top shape. This guide is designed to educate and help you ensure optimal performance, seamless connectivity, and long-term durability. Here's a quick overview covering the essentials.

Hearing Aid Repair
Hearing aid repair involves addressing issues that affect the device’s performance, such as physical damage, moisture exposure, sound distortion, or complete sound loss. Common repairs include replacing broken batteries/contacts, replacing microphones or receivers, cleaning internal components, and reprogramming the software. Devices may also require service due to feedback noise or poor sound quality caused by wax or debris buildup. Many modern hearing aids come with a warranty, typically lasting two to three years, which will cover these repairs. Prompt attention to any malfunction helps restore functionality and prevents further damage.
Pairing Bluetooth Hearing Aids with Smartphones

Pairing Bluetooth Hearing Aids to an iPhone:
Here are step-by-step instructions for pairing Bluetooth hearing aids to an iPhone, including MFi (Made for iPhone) and some ASHA-compatible devices that also support Apple’s protocols:.
- Turn on Bluetooth: Go to Settings > Bluetooth Make sure Bluetooth is on.
- Put the Hearing Aids in Pairing Mode: Turn hearing aids off and back on (place them in the charger for 5 seconds). This puts them into pairing mode for 3 minutes.
- Connect via Accessibility Settings: Go to Settings > Accessibility > Hearing Devices tap on your hearing aid name when it appears, tap pair when prompted (for each hearing aid if you have two).
- Wait for Connection: Once paired, the status will change to Connected. Sounds from the iPhone (calls, music, etc.) will now stream to your hearing aids.
- Pair Hearing Aids to the Manufacturer’s App: Download the App from the App Store.
- Enable Permissions: Allow access to Bluetooth, Location, and Notifications if prompted.
- Pair in the App: Open the app and follow the on-screen instructions to detect and connect your hearing aids. This may require turning the hearing aids off and on again to enter pairing mode (place them in the charger for 5 seconds).
Pairing Bluetooth Hearing Aids to a Samsung Smartphone (Android Smartphone):
Note: Not all Android devices support direct streaming. Check if your phone and hearing aids support ASHA (Audio Streaming for Hearing Aids). Here is a step-by-step guide for pairing Bluetooth hearing aids to an Android smartphone, specifically those that support ASHA (Audio Streaming for Hearing Aids)—the standard used for direct audio streaming on Android.
- Turn on Bluetooth: Go to Settings > Connected devices > Connection preferences > Bluetooth Make sure Bluetooth is ON.
- Pair Hearing Aids to the Manufacturer’s App: Download the App from the Play Store.
- Enable Permissions: Allow access to Bluetooth, Location, and Notifications if prompted.
- Pair in the App: Open the app and follow the on-screen instructions to detect and connect your hearing aids. This may require turning the hearing aids off and on again to enter pairing mode (place them in the charger for 5 seconds).
Hearing aid manufacturer's smartphone applications (Apps):
Here’s a list of major hearing aid manufacturers along with their official mobile apps, available for both iPhone (iOS) and Android devices. These apps allow you to control and customize your hearing aids — including volume, programs, streaming, battery monitoring, and firmware updates.
Signia: Signia App
Widex: Widex Allure (Widex Moment for hearing aids on the Moment platfrom)
Phonak: myPhonak
Oticon: Oticon Companion
Bernafon: Bernafon App
Starkey: myStarkey
GN Resound: ReSound Smart 3D
Unitron: Unitron Remote Plus


